

Dashboard
SHOE
Elementary instructions
Check
Control structures


Dashboard
SHOE
Elementary instructions
Check
Control structures


Dashboard
Running the program
Step-by-step execution
Test conditions
Test result

You have to create a program that enables the coin-tossing robot to work properly.
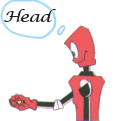
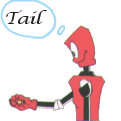
The robot has to toss a single coin into the air, catch it and then display whether it sees head or tail.
To do this, you have a number of commands at your disposal that the robot understands:
Your program (code) should be created by dragging the various elements from the "shoe" on the right to the magnetic board on the left. The few basic rules for arranging the various elements (syntax rules) are explained in the "Help" section.
The code you create will be considered correct if the 2 runtime tests are successful together (the corresponding buttons have all turned green).
Good work and good success.
Never forget that mistakes are more instructive than successes,
as long as you take the trouble to understand the causes.
◊ ◊ ◊


|
All you have to do is drag the various elements provided in the "shoe" and arrange them in the right order on the magnetic board on the left of the screen.
You can always move the elements in this way if you want to change your code. There is no set order for composing your code; you can start at the end but, in the end, your program will have to comply with the layout rules (syntax rules) defined below. |

|
By convention, the following elements must stand alone on their lines of code: - Basic action instructions; - The "ELSE"; - The "END IF"; - The "REPEAT" (later); - And the "END WHILE" (later). |

|
To check which side of the coin is visible when it is caught, you can construct a condition as follows. For line 1, if the face-up side is "Tail", the result will be "True". If the face-up side is "Head", the result will be "False". For line 2 (later), it's the other way round. Note that the "IF", the Check and the "THEN" have to be in the same line. |
 Before Before
|
 After clicking on number 2 After clicking on number 2
|
| Clicking on a line number in the magnetic board will free up that line so that a code element can be inserted. | |
To remove an item from the magnetic panel, simply place it on the bin and it will disappear the next time you click on the "Organize" button.
◊ ◊ ◊
© Rupert Meurice de Dormale 2024 (update of the 1995 version)
All rights reserved. Copying in whole or in part prohibited without written permission of the author.
The drawings of the robots are by Jean-Baptiste Sonnet.
Thanks to Nicolas De Bolle for his indispensable help in updating this project.
![]()